

Mastering 2 ml centrifuge tubes is key for lab success. It’s crucial for getting reliable results in molecular biology and biochemistry. These small tubes are designed for efficient separation during centrifugation.
By following best practices, researchers can ensure their results are accurate and consistent. Knowing how to use these tubes properly is the first step to success in experiments.
Key Takeaways
- Proper use of 2 ml centrifuge tubes is essential for lab efficiency.
- Reliable outcomes are achieved through correct handling techniques.
- Understanding tube design is crucial for sample processing.
- Attention to detail enhances experimental accuracy.
- Best practices promote reproducibility in research results.
Pre-Filling Preparations
Getting ready is crucial for using 2 ml centrifuge tubes well. Before you fill them, you need to do a few key things. This ensures your samples stay safe and your equipment works right.
Inspection of 2 ml Centrifuge Tubes
Checking centrifuge tubes carefully is very important. Make sure each tube is okay, with no cracks or damage. Bad tubes can mess up your samples during spinning, leading to wrong results.
Sample Compatibility Considerations
Knowing if your samples go well together is key. Look at your samples’ thickness and weight. This helps them spin right without trouble.
Gathering Necessary Equipment
Before you start filling, get all your gear ready. You’ll need:
- Pipettors for precise sample pouring
- Personal protective equipment (PPE) for safety
- Adapters for different rotors, if needed
| Equipment | Purpose |
|---|---|
| Pipettors | For accurate sample dispensing |
| PPE | Ensures safety during handling |
| Adapters | Facilitates use with various rotor types |
Proper Filling
Filling 2 ml centrifuge tubes with precision is key for good lab results. Following the right filling volumes helps in separating samples well. It keeps samples safe and results accurate, especially for special samples.
Optimal Filling Volumes
The best filling volumes for centrifuge tubes are between 0.5 ml and 1.5 ml. This range helps in separating samples well without spills or contamination. Too much or too little can mess up results and damage samples.
Pipetting Techniques
Using the right pipetting techniques is vital for precise filling. Here are some tips:
- Use calibrated pipettes for accurate measurements.
- Avoid rapid plunging to prevent air bubbles.
- Keep the pipette tip submerged to avoid splashing.
Learning these techniques improves the quality of lab samples.
Handling Special Samples
Special samples, like biological materials or sensitive reagents, need extra care. They can degrade or get damaged if not handled right. It’s important to:
- Use gentle pipetting methods.
- Fill tubes to the right volume without over or under.
- Store samples properly before centrifugation.
Following these steps is crucial for successful analysis and accurate results.
Secure Sealing
It’s very important to seal 2 ml centrifuge tubes well. This stops samples from getting lost or contaminated during spinning. There are many cap types for these tubes, each affecting how well they seal. Knowing how to seal them right is key to keeping samples safe.
Cap Types for 2 ml Centrifuge Tubes
There are different caps for different needs and materials:
- Snap Caps: These are good for most lab work. They seal well and are easy to use.
- Screw Caps: These are better for dangerous or volatile samples. They seal tighter.
- Sealable Caps: These are for extra security against leaks. They’re used in very sensitive areas.
Sealing Procedures
To seal tubes well, follow these steps:
- Make sure the tube rim is clean and free of dirt.
- Choose the right cap for your samples and needs.
- Press down and twist or snap the cap to seal it.
Good sealing keeps samples safe and in the right condition.
Dealing with Seal Failures
When seals fail, you need to find and fix the problem fast. Common reasons include:
- Not applying the cap right.
- Wear and tear from harsh chemicals or too much use.
- The sample and cap material don’t match.
It’s important to have plans for dealing with these issues. This keeps your lab running smoothly and your samples quality high.

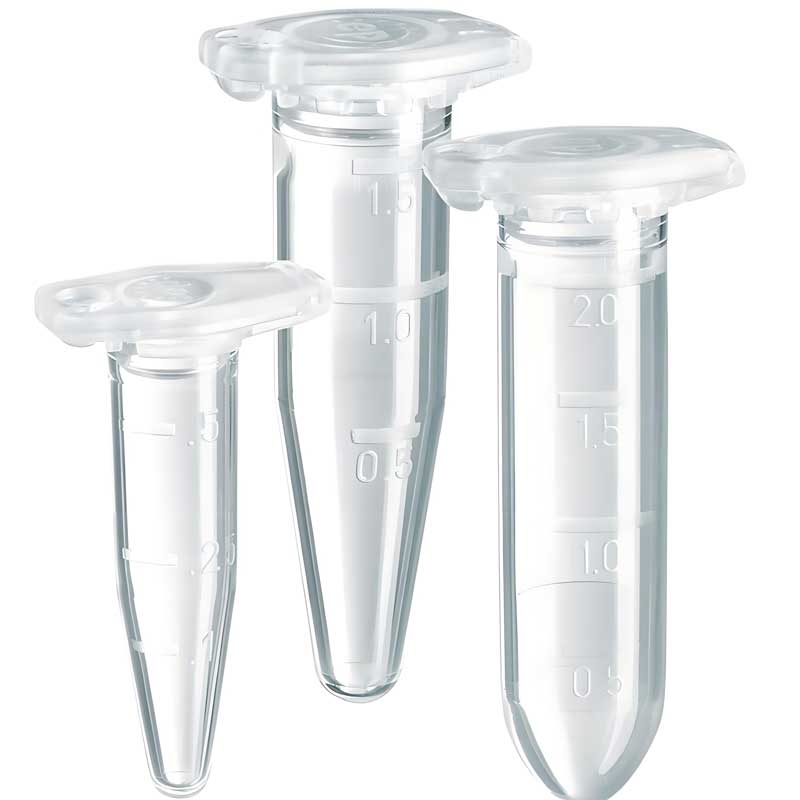
2-ml-centrifuge-tube-use
Effective Centrifuging
Understanding effective centrifuging is key in lab settings. Choosing the right centrifuge for 2 ml tubes is important. It depends on the sample type and what you want to achieve. Loading the tubes right and setting the centrifugation correctly are crucial for good results.
Choosing the Appropriate Centrifuge
When picking a centrifuge for 2 ml tubes, think about your samples. Different rotors, like fixed-angle and swing-bucket, suit different needs. Make sure the centrifuge fits your tube design for the best results.
Loading 2 ml Centrifuge Tubes
Correctly loading centrifuge tubes is vital for balance. Spread the tubes out on the rotor to avoid vibration. This ensures your results are accurate. Wrong loading can cause problems and bad data.
Centrifugation Settings
Getting the right centrifugation settings is essential. This includes speed (rpm) and time. Adjust these based on the needed relative centrifugal force (rcf). Keeping an eye on these settings helps get consistent results.
Post-Centrifugation Handling
Proper handling after centrifugation is key in labs. Getting 2 ml centrifuge tubes right is crucial. It keeps samples safe.
After getting the tubes, analyzing them is next. This step needs care to avoid contamination. Paying close attention here is important for good results.
Finally, getting rid of tubes or cleaning them is vital. This follows safety rules, especially with dangerous materials.
Retrieving 2 ml Centrifuge Tubes
Here’s how to handle tubes after centrifugation:
- Wait for the rotor to stop completely before opening.
- Hold the tube with gloves to avoid mixing the sample.
- Use a tube rack to carry the tubes safely to the analysis area.
Analyzing Samples
For good analysis, follow these steps:
- Use a pipette to take out supernatants to avoid contamination.
- Move pellets carefully to not mess up the sample.
- Write down any notes during analysis for accurate records.
Tube Disposal or Cleaning
Proper tube disposal is important. Here’s what to do:
- Follow rules for throwing away biohazardous materials.
- Clean reusable tubes with the right solvents to avoid contamination.
- Put cleaned tubes in a special place to stay organized.
Troubleshooting
In the lab, using 2 ml centrifuge tubes right is key for good results. But, filling, sealing, and centrifugation can go wrong. Knowing these common problems helps keep your work smooth and your samples reliable. Here are tips for each step.
Filling-Related Issues
Filling can go wrong, like using the wrong amount or getting samples mixed up. This might happen if you’re not careful with your pipette or don’t check if samples match. Make sure to check your filling method and adjust if needed to avoid contamination.
Sealing-Related Issues
Sealing problems can cause big issues, like leaks or damage to your samples. Issues like bad caps or not sealing right are common. Check your caps and make sure you’re sealing properly. Regular checks on your equipment will help you spot and fix problems fast.
Centrifugation-Related Issues
Centrifugation can go wrong if you set it up wrong or load the tubes unevenly. Always check your procedures and make sure your centrifuge is set right. Following the maker’s guide for loading tubes will help you get better results.
References and further readings:
1.Schumaker, V. N., & Puppione, D. L. (1986).
Sequential flotation ultracentrifugation. Methods in Enzymology, 128, 155–170.
https://www.sciencedirect.com/science/article/pii/0076687986280660
2.Luckiram, B. (2022).
Centrifugation. In Integration and Optimization of Unit Operations (pp. 369–395). Elsevier.
https://www.sciencedirect.com/science/article/pii/B9780128235027000141
3.Gupta, M., & Shevkoplyas, S. S. (2008).
Egg beater as centrifuge: isolating human blood plasma from whole blood in resource-poor settings. Lab on a Chip, 8(12), 2032–2037.
https://pubs.rsc.org/en/content/articlehtml/2008/lc/b809830c
FAQ
What are 2 ml centrifuge tubes used for in laboratory applications?
2 ml centrifuge tubes are key in labs for processing samples. They help separate materials through centrifugation. This is crucial in molecular biology and biochemistry.
How do I properly fill a 2 ml microcentrifuge tube?
Fill the tube between 0.5 ml and 1.5 ml for best results. This avoids spills and ensures good separation. Use the right pipetting to avoid air bubbles and errors.
What factors should be considered regarding sample compatibility with 2 ml centrifuge tubes?
Think about your sample’s viscosity and density. These affect how it behaves during centrifugation. Making sure it’s compatible is key to keeping your sample safe.
What types of caps are available for 2 ml centrifuge tubes?
You can choose from snap caps and screw caps. The right cap depends on your needs and the application.
How should I seal 2 ml centrifuge tubes to prevent contamination?
Seal the tubes tightly but carefully. Make sure the cap fits well without damaging the tube. Use the right sealing method, especially for volatile or hazardous substances.
What type of centrifuge should I select for optimal performance with 2 ml centrifuge tubes?
Choose a centrifuge based on your sample and desired results. Use the correct rotor type, fixed-angle or swing-bucket, for your application.
What are the recommended centrifugation settings for 2 ml centrifuge tubes?
Set the speed (rpm) and time based on the relative centrifugal force (rcf) needed. Following these settings is crucial for effective separation.
How should I retrieve 2 ml centrifuge tubes after centrifugation?
Be careful when taking out the tubes to not disturb the samples. Use precise techniques to remove supernatants or pellets without contamination.
What steps should I take for post-centrifugation tube disposal or cleaning?
Properly dispose of or clean the tubes, especially if they’ve held hazardous materials. This follows lab protocols and keeps everyone safe.
What common problems can arise with 2 ml centrifuge tubes?
Issues like wrong filling, seal failures, and bad centrifugation settings can happen. Having a plan to fix these problems helps keep your work smooth and accurate.
Leo Bios
Hello, I’m Leo Bios. As an assistant lecturer, I teach cellular and
molecular biology to undergraduates at a regional US Midwest university. I started as a research tech in
a biotech startup over a decade ago, working on molecular diagnostic tools. This practical experience
fuels my teaching and writing, keeping me engaged in biology’s evolution.


Leave a Comment
Your email address will not be published. Required fields are marked *