



Ever wondered why some lab experiments work while others fail? The key is in mastering gel loading techniques. These can make or break your research.
Gel loading is key in molecular biology, especially for DNA experiments. Scientists need to place samples just right for accurate results. Learning the right gel loading techniques can greatly improve your work.
For DNA analysis, researchers must be very careful with gel loading. They need to prepare samples well, control volumes, and use the right pipette tips. This ensures the best results.
Key Takeaways
- Gel loading is fundamental to successful molecular biology experiments
- Precise micropipette techniques are crucial for accurate sample placement
- Recommended loading volumes range from 2-20 μl depending on well size
- Different gel types require specific loading strategies
- Proper tip selection can significantly impact experimental outcomes
Understanding Gel Loading in Molecular Biology
Gel loading is a key method in molecular biology. It helps scientists separate and study genetic materials with great detail. They use agarose gel pipetting to place samples accurately and get reliable results.
Labs use advanced gel loading methods to study DNA, proteins, and other important molecules. They carefully move samples into gel wells. This process avoids contamination and ensures consistent results.
The Importance of Accurate Gel Loading
Getting precise gel loading is crucial for clear research results. Important factors include:
- Consistent sample volume
- Proper use of loading dye for gels
- Avoiding air bubbles during sample insertion
- Maintaining sample integrity
Common Applications of Gel Loading
Scientists apply gel loading in many research areas:
| Research Area | Specific Application |
|---|---|
| Genetic Research | DNA fragment analysis |
| Molecular Diagnostics | PCR product verification |
| Protein Studies | Protein separation techniques |
“Precision in gel loading is not just a technique, it’s the foundation of reliable molecular research.” – Dr. Elizabeth Thompson, Molecular Biology Research Institute
Knowing these techniques helps researchers get reliable, high-quality data. They do this through careful agarose gel pipetting and choosing the right loading dye.
Types of Gels Used in Molecular Biology
Gel electrophoresis is key in molecular biology. It helps separate and analyze biological molecules. Knowing the differences between gel types is crucial for precise research.
Agarose and polyacrylamide gels are the main types used. Deep well plates aid in preparing samples efficiently.
Agarose Gels: DNA Separation Powerhouse
Agarose gels are great for DNA. They are known for:
- Ideal for DNA fragments between 50-20,000 base pairs
- Gentle separation method preserving DNA integrity
- Widely used in molecular cloning and genomic research
Polyacrylamide Gels: Protein Analysis Specialists
Polyacrylamide gels are best for proteins and small DNA. They offer:
- High resolution for proteins and peptides
- Capable of separating molecules with minimal size differences
- Suitable for precise protein molecular weight determination
Selecting the Right Gel for Your Experiment
Choosing between agarose and polyacrylamide gels depends on your research needs. Here’s a comparison to help:
| Gel Type | Molecule Type | Resolution Range | Typical Application |
|---|---|---|---|
| Agarose | DNA | 50-20,000 bp | Genomic studies |
| Polyacrylamide | Proteins/Small Nucleic Acids | 10-500 base pairs | Protein analysis |
When picking gel electrophoresis techniques, consider fragment size and resolution. The right gel ensures accurate results.
Preparing DNA or Protein Samples for Loading
Preparing samples for gel electrophoresis is key to good results. It’s important to adjust the sample’s concentration and choose the right buffers. This ensures the samples load well and are analyzed correctly.
Getting the sample preparation right is crucial. Knowing how to adjust the concentration and pick the right buffers makes a big difference. It helps get better results from your experiments.
Sample Concentration Optimization
To get the sample concentration just right, consider these points:
- Determine the right amount of sample to use
- Figure out the best concentration range
- Make 10% extra to cover any lost during pipetting
Reducing Agent Selection
Choosing the right reducing agent is key to stop samples from leaking in gels. Here are some good options:
| Reducing Agent | Recommended Concentration |
|---|---|
| NuPAGE Reducing Agent | Follow the maker’s advice |
| Dithiothreitol (DTT) | Use 50 mM |
| β-mercaptoethanol | Use 2.5% |
| TCEP | Use 50 mM |
Sample Preparation Recommendations
To get the best results, follow these important tips:
- Heat the samples at 85°C for 2-5 minutes
- Don’t store reduced samples for too long
- Keep reduced and non-reduced samples separate to avoid contamination
Learning these detailed steps helps you load gels properly. It also stops samples from leaking. This makes your experiments more precise and reliable.
Essential Equipment for Gel Loading
For gel loading, you need precision and the right tools. Researchers must pick equipment that helps apply samples accurately and see them clearly. The success of molecular biology experiments depends on using the right lab tools.
Proper pipetting is key to avoid air bubbles in gel wells. It keeps experiments reliable. Scientists use special equipment to avoid mistakes during sample prep.
Selecting the Right Pipettes and Tips
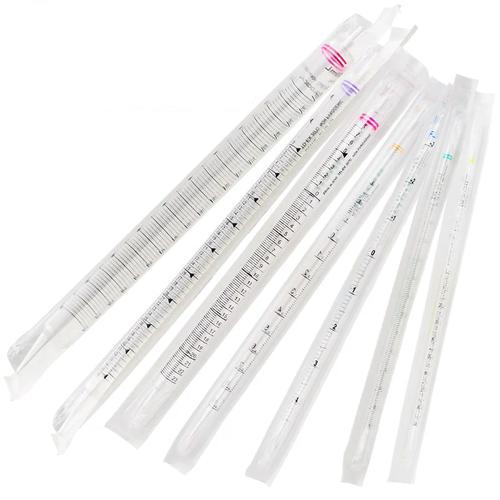
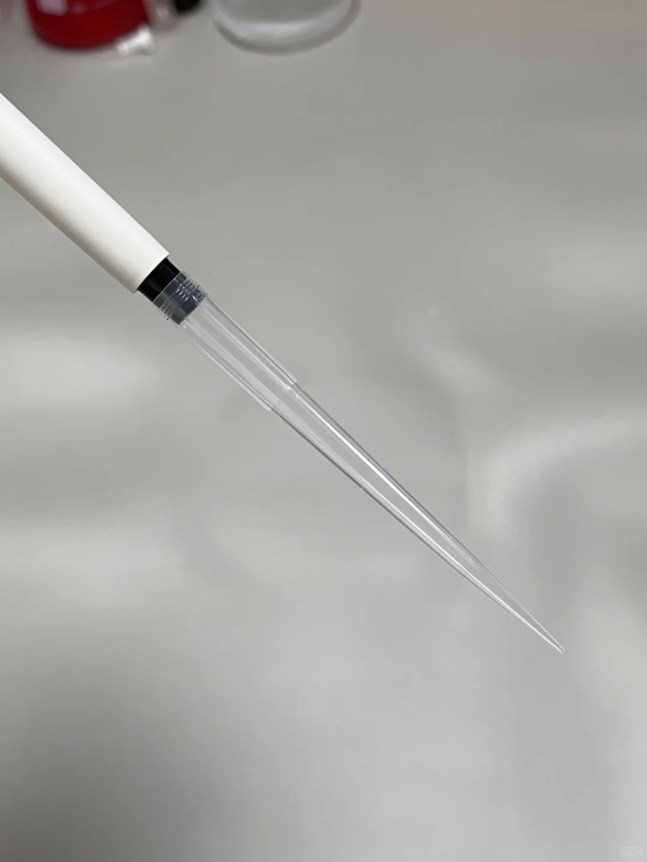
Gel loading needs special pipette tips. They have unique features:
- Universal fit for many pipette brands
- Specific volume ranges (0.1-10 µL)
- Sterile and free from contamination
- Different tip shapes and orifice designs
Importance of Gel Loading Dyes
Brightly colored loading dyes are vital in molecular biology. They help researchers:
- See how samples move
- Watch how samples progress
- Load gels accurately
Precision in sample prep is key to a successful molecular biology experiment.
Choosing the right loading dyes is crucial. They should be clear to see without affecting results. The right mix of pipette tips and dyes can greatly improve your results.
Techniques for Effective Gel Loading
Getting good results from gel loading is key for research. It’s important to learn how to load samples right. This helps make sure your results are clear and reliable.
Doing gel loading well takes a lot of focus and skill. By using smart ways to put samples on the gel, you can get better results.
Ensuring Sample Visibility
Being able to see your samples clearly is crucial. Here are some tips to help:
- Make sure your lab has good lighting
- Choose gel loading dyes that stand out
- Place your samples just right in the gel wells
- Try specialized lighting for clearer views
Avoiding Air Bubbles
Air bubbles can mess up your results. To avoid them, you need to be careful:
- Load your samples slowly
- Use pipette tips that don’t hold onto your sample
- Put your samples at the bottom of the well
- Check for bubbles before you start the experiment
Professional tip: The E1-ClipTip Adjustable Tip Spacing Multichannel Electronic Pipette can save up to 80% of typical loading time while reducing the risk of air bubble formation.
Experts know that gel loading is more than just a skill. It’s about being prepared and using the right techniques. By following these steps, scientists can make their experiments more accurate and reliable.
Troubleshooting Common Gel Loading Issues
Gel loading can be tricky and affect the quality of molecular biology experiments. Knowing these common problems helps researchers improve their DNA gel loading skills. This leads to more reliable results.
Researchers often face specific problems during gel electrophoresis. These issues can ruin the results of their experiments. It’s important to find and fix these problems for accurate molecular analysis.
Sample Banding Complications
Sample banding issues come from a few main factors:
- Overloading samples beyond 0.1–0.2 μg per millimeter of gel well width
- Inappropriate voltage settings
- Inconsistent gel preparation
- Poor sample preparation techniques
Here are some tips to help solve banding problems:
- Make sure to have the right sample concentration
- Use the same gel thickness (3-4 mm)
- Keep the voltage the same during electrophoresis
- Choose the right buffer systems
Sample Migration Challenges
Uneven sample migration can really mess up experimental results. Common migration problems include:
- Trailing smears from overloading
- Warped band shapes
- Unexpected fragment separation
- Background noise from bad reagent quality
To tackle these DNA gel loading challenges, pay close attention to experimental conditions. Also, have precise technical skills. Regularly check equipment, use top-notch reagents, and stick to standard protocols. This helps avoid migration problems.
Tips for Loading Multiple Samples
Researchers often face the challenge of loading many samples efficiently. The right approach can make lab work smoother and cut down on mistakes. This is crucial for gel electrophoresis experiments.
Efficient sample loading needs careful planning and the right tools. Multi-channel pipettes have changed the game by allowing for quick, simultaneous sample transfers. This saves a lot of time.
Mastering Multi-Channel Pipette Techniques
Multi-channel pipettes bring big benefits to gel loading:
- Up to 80% less time spent loading
- Handling 8-12 wells at once
- Adjustable tip spacing from 4.5 mm to 14.2 mm
- Less user fatigue
Organizing Samples Effectively
When using loading dye for gels, a systematic approach is key:
- Make a detailed sample loading map
- Use color-coded loading dyes
- Keep volume control precise
- Prevent cross-contamination
“Precision in sample organization is the key to reliable gel electrophoresis results.”
Modern pipette technologies, like the E1-ClipTip, offer new features. These include interlocking tip technology, which stops sample loss and keeps performance steady across multiple tries.
Pro tip: Always check tip compatibility and volume graduations to keep experiments accurate during agarose gel pipetting.
Best Practices for Staining and Visualizing DNA or Proteins
Choosing the right staining method is key to successful gel electrophoresis. It helps reveal the molecular details of your samples. There are many visualization techniques to choose from, each enhancing the clarity and sensitivity of your results.
Comprehensive Staining Methods for Molecular Analysis
Each staining approach has its own strengths for detecting DNA and proteins:
- Coomassie Blue Staining
- Sensitivity: 5-25 ng per band
- Protocol time: 10-135 minutes
- Ideal for protein visualization
- Silver Staining
- Sensitivity: 0.25-0.5 ng per band
- Protocol time: 30-120 minutes
- Most sensitive colorimetric method
- Fluorescent Dye Staining
- Sensitivity: 0.25-0.5 ng per band
- Protocol time: 60 minutes
- High-resolution detection
Techniques for Enhanced Visualization
Using the right gel loading technique is essential for clear results. Consider factors like sample concentration, dye interactions, and imaging conditions. These can greatly improve visualization quality.
When picking a staining method, think about what your molecular analysis needs. Each technique has its own benefits. These can greatly affect how you interpret your data.
Documenting and Analyzing Gel Results
Getting gel electrophoresis results right needs careful attention. It’s important to document everything well. This ensures your findings are reliable and can be repeated.
Keeping samples from leaking and avoiding air bubbles in gel wells is key. These steps help get clear, easy-to-understand results.
Importance of Comprehensive Record-Keeping
Good documentation is more than just taking a photo. Top researchers keep detailed records. These include:
- Experimental conditions
- Sample preparation details
- Gel running parameters
- Staining techniques
The quality of deep well plates affects how well you can document gels. They help keep samples consistent.
Analyzing Electrophoresis Images
Looking at gel images needs a methodical approach. Researchers should:
- Measure band sizes
- Quantify intensity
- Compare samples
Accurate documentation is the cornerstone of reproducible scientific research.
When analyzing images, watch out for artifacts and check band clarity. Make sure your methods are consistent. Paying attention to preventing leaks and avoiding air bubbles greatly improves your gel results.
Future Trends in Gel Loading Techniques
The world of molecular biology is changing fast. New technologies are making gel loading better. Scientists are working on ways to prepare and see samples more efficiently.
They’re using high-performance plate technologies to speed up and improve their work. This means less time spent on experiments and more accurate results.
Now, experts recommend using brightly colored loading dyes. These dyes help track samples and cut down on mistakes. New pipette systems, like the E1-ClipTip Equalizer, can make loading samples up to 80% faster. This makes labs work more smoothly.
Advances in Gel Materials
New synthetic polymers are changing gel making. They offer better separation and last longer. Scientists are making gels with smaller pores and better resolution.
This lets them separate DNA and proteins more clearly. It means they can get better results without damaging the samples.
Innovations in Electrophoresis Technology
Automated systems and high-throughput platforms are getting smarter. They use advanced detection and precise handling to reduce mistakes. This makes experiments more reliable.
The future of gel electrophoresis is bright. It will combine top-notch tools with smart software. This will give scientists real-time analysis and detailed records.
FAQ
What is the most critical factor in successful gel loading?
Precision and technique are key to successful gel loading. Researchers must apply samples carefully to gel wells without air bubbles. They also need to keep sample concentration consistent and use the right loading dyes.
How do I choose between agarose and polyacrylamide gels?
Your choice depends on your research needs. Agarose gels are best for DNA and larger molecules, offering wide separation ranges. Polyacrylamide gels are better for smaller molecules like proteins, giving precise separation.
What are common mistakes during gel loading?
Mistakes include air bubbles in wells and wrong sample concentration. Pipetting inconsistently and cross-contaminating samples are also errors. Not using the right loading dyes can also affect results.
How can I prevent sample leakage during gel loading?
Use high-quality gel wells and pipette samples slowly. Choose the right viscosity loading buffers and keep your technique consistent. Avoid overfilling wells and ensure samples are concentrated enough.
What type of pipette is best for gel loading?
Use precision micropipettes with adjustable volume settings. Single-channel pipettes are good for a few samples. Multi-channel pipettes are best for many samples at once, saving time.
How do I optimize sample concentration for gel electrophoresis?
Start with recommended concentration ranges for your molecular type, like 10-100 ng/μL for DNA. Use loading dyes to check visibility and adjust concentration for clear bands.
What are the best practices for staining gels?
Choose the right stain for your molecular type, like ethidium bromide for DNA. Follow the manufacturer’s instructions and use protective gear. Optimize staining time and concentration for clear bands.
How can I troubleshoot uneven band migration?
Check gel preparation and buffer conditions. Verify sample purity and use fresh buffers. Ensure proper voltage and a level gel during running. Uneven migration can come from many technical issues.
What innovations are emerging in gel loading techniques?
New innovations include automated loading systems and high-throughput platforms. There are also advanced fluorescent dyes and synthetic polymer gels. Digital imaging technologies improve result visualization and quantification.
How important is documentation in gel electrophoresis?
Documentation is crucial for reproducibility. Capture high-quality gel images and record experimental conditions. Note sample preparation and store data properly. Good documentation helps in interpreting results and validating research.




Leave a Comment
Your email address will not be published. Required fields are marked *